


Using tools like Google Analytics, Adobe Analytics or a similar system, there are a number of ways to appropriately track performance for various online marketing efforts. To work correctly, these systems require placement of tracking code in your site’s files. Inserting tracking snippets can be complicated if you are not familiar with your site’s files and there is little room for error. Even one small character missing from the javascript string could cause metrics to report incorrectly or worse, it could cause issues with other aspects of your site.
For this reason and to centralize all tracking in one location, we prefer to use the Google Tag Manager.
What is Google Tag Manager?
The Google Tag Manager (GTM) is a way to compile all of your tracking into one container and publish the container outside of your existing site files. You begin by placing one (yes, only one) snippet of javascript into the files of your site to act as a parent container for any analytics or marketing tracking you may use. Using one tag versus a separate tag for all of your different tracking removes the likelihood of errors that could happen.
The Old Way
You may be launching a new pay-per-click advertising campaign and want to track its conversions. To make sure your conversion tracking is properly set up, you need to insert Google Ads tracking into the header of your site for each page you need to track. For most content management systems, this means locating the header file of your site and inserting the code alongside any other tracking snippets. For any older sites built with static HTML pages, this means adding the tag to the header of every single page.

Any time you would like to track something new, you have to repeat this process of diving into site files and updating snippets of javascript.
The New Way
Using the same scenario of launching a new pay-per-click campaign where you want to track ad conversions, you add one piece of code to your header files to use the Google Tag Manager. Then, using the GTM interface, you choose the ads account you want to track and the additional code is automatically inserted into your site without you having to drill into the site’s files.
Any time you would like to track something new, you simply select the tracking code (the platform currently offers 50 different types of tracking for analytics and advertising) from within the GTM interface. As long as everything looks correct, you publish the container and the new tracking code immediately appears within the source of your site.
Say Goodbye to Developer Tickets
If you’re used to having to write up a ticket for your webmaster or web developer to update tracking codes and then play the waiting game to have the tracking go live, the GTM gives you the opportunity to avoid all of that. As long as the container exists on the site, you take control of being able to publish any tags you want and whenever you want.
How to Get Started with Google Tag Manager
Step one, make sure you have a Google account to work with. If you are already using a Google account for email (Gmail), advertising or analytics, you’ll want to use that same account. Using the same account will make it easier for you to manage everything under one umbrella account.

Next, head over to https://marketingplatform.google.com/about/tag-manager/ to start your Google Tag Manager account. The platform will provide the container snippet you will need to add to a couple of places on your site. Adding this container code is the only time you’ll have to dig into your site’s files – once it is added, there won’t be any need touch site files again.
Using WordPress As Your CMS? It’s Even Easier.
Many small-to-midsized businesses use WordPress as their content management system. If you are running on WordPress, implementing GTM is even easier.
Locate and install the plug-in Google Tag Manager by Thomas Geiger. When prompted, enter your Google Tag Manager ID and any other details about your account. The plug-in will insert the required code into your site’s files without you having to dig into any type of code. From there, you’ll add tracking through the tag manager interface.
Easy, right?
Test, Test, Test
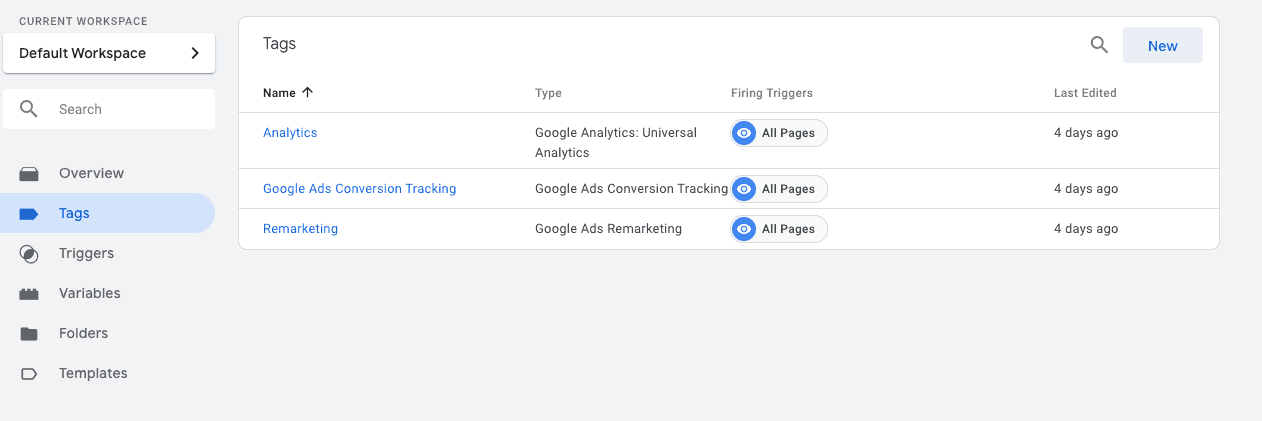
Once you are all set up on GTM, you successfully enable streamlining of all of your tracking and can make easy adjustments as needed. Start by setting up your Google Analytics tracking, Google Ads conversion tracking and Google Ads remarketing code. These tracking pieces are fundamental to most digital marketing campaigns and will be the best way to familiarize yourself with the Google Tag Manager interface. Publish the GTM container so tracking is live on your site, then test, test, test. If set up correctly, you will see traffic through Google Analytics, conversions through Google Ads and you should see your remarketing list begin to grow.
These are just the basics to getting started with Google Tag Manager. As you become more comfortable with the interface, you’ll find there are many more things to track that lend themselves to better understanding the behavior of your site visitors.
With the right data at your fingertips, you have the ability to become a much stronger marketer.